Thai Ginger: How to Grow and Care
Introduction
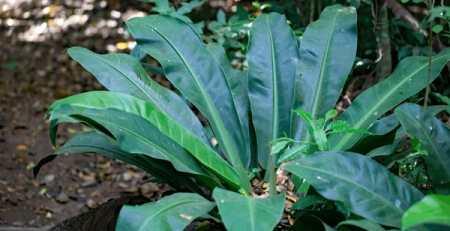
Thai ginger, also known as galangal (Alpinia galanga), is a versatile and aromatic rhizome widely used in Southeast Asian cuisine, particularly Thai and Indonesian dishes. Known for its peppery, citrusy flavor and medicinal properties, Thai ginger is a staple in curries, soups, and teas. Beyond its culinary uses, galangal is prized for its striking appearance, with long, lance-shaped leaves and a bold, tropical presence in gardens or containers. This guide will cover everything you need to know about growing, caring for, and harvesting Thai ginger, ensuring you can enjoy both its beauty and functionality.

Why Grow Thai Ginger?
Growing Thai ginger offers numerous benefits, from enhancing your culinary creations to adding ornamental value to your garden. Its unique flavor profile makes it a must-have ingredient for anyone who enjoys cooking authentic Southeast Asian dishes, and having fresh galangal on hand elevates the taste and aroma of your meals. Thai ginger is also known for its medicinal properties, traditionally used to aid digestion, reduce inflammation, and boost immunity.
Beyond its culinary and health benefits, Thai ginger is an attractive addition to gardens and containers. Its lush green foliage and upright growth habit create a tropical vibe, making it a beautiful feature in edible landscapes or as a focal point in container gardens. Thai ginger’s adaptability to various growing conditions makes it suitable for gardeners of all skill levels, whether you have a large garden, a small patio, or even just a windowsill.
How to Grow Thai Ginger
Thai ginger thrives in warm, humid climates and requires conditions that mimic its native tropical habitat. Plant galangal in a location that receives partial to full sun, with well-draining, fertile soil enriched with organic matter like compost. If growing in containers, use a pot with adequate drainage holes and a high-quality potting mix.
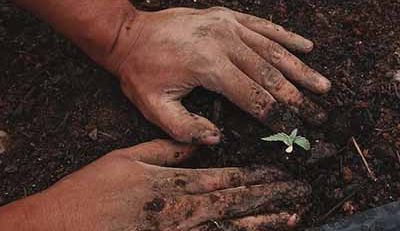
To start Thai ginger, you can use fresh galangal rhizomes purchased from a nursery or an Asian grocery store. Look for firm, plump rhizomes with visible “eyes” or buds. Plant the rhizome horizontally, about 2–4 inches deep, and cover lightly with soil. Water thoroughly to settle the soil and encourage root establishment. Thai ginger takes several weeks to sprout, so patience is key. Keep the soil consistently moist but not soggy during this period.
How to Care for Thai Ginger
Caring for Thai ginger involves providing the right balance of water, nutrients, and light to ensure healthy growth. Consistent watering is essential, as Thai ginger prefers moist soil. Water regularly, especially during dry spells, but avoid waterlogging, as it can lead to root rot. Mulching around the plant helps retain moisture and suppress weeds.
Fertilizing galangal during the growing season encourages lush foliage and robust rhizome development. Use a balanced fertilizer or organic options like compost or worm castings every 4–6 weeks. Galangal also benefits from occasional foliar feeding, which involves spraying diluted liquid fertilizer directly onto the leaves. Pruning isn’t typically required, but removing dead or yellowing leaves keeps the plant tidy and redirects energy to new growth.
Growing Thai Ginger in Containers
Choosing the Right Container and Soil
Growing Thai ginger in containers is an excellent solution for gardeners with limited space or those living in climates with seasonal temperature fluctuations. Select a container that is at least 12 inches deep and wide enough to accommodate the plant’s growing rhizomes. Proper drainage is crucial, so choose a pot with multiple drainage holes to prevent waterlogging, which can lead to root rot. For the soil, opt for a well-draining potting mix enriched with organic matter, such as compost or aged manure. Adding perlite or sand to the mix can improve aeration and drainage, ensuring healthy rhizome development.
Optimal Placement and Sunlight
The placement of your container plays a critical role in the success of growing Thai ginger. Position the pot in a location that receives ample sunlight, ideally 6–8 hours of direct or partial sunlight daily. A patio, balcony, or near a bright, south-facing window is ideal. If sunlight is limited, especially indoors, consider using grow lights to provide the necessary light intensity. Container gardening allows you to move the plant easily, offering flexibility to adjust its placement based on seasonal light changes or weather conditions.
Watering and Maintenance
Container-grown Thai ginger tends to dry out faster than plants grown directly in the ground, requiring more frequent watering. Check the soil regularly and water when the top inch feels dry, ensuring the soil remains consistently moist but not soggy. Adding a layer of mulch to the surface of the pot can help retain moisture and regulate soil temperature. Feeding the plant every 4–6 weeks with a balanced liquid fertilizer or organic compost ensures it gets the nutrients needed for robust growth. Periodically prune any dead or yellowing leaves to maintain the plant’s health and appearance.
Benefits of Growing Thai Ginger
The benefits of growing Thai ginger extend far beyond its culinary uses. Having a fresh supply of galangal allows you to enhance the flavor and aroma of your dishes without relying on store-bought options. Thai ginger’s medicinal properties, including its anti-inflammatory and digestive benefits, make it a valuable addition to your home garden or kitchen.
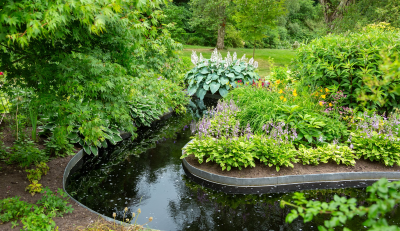
In addition to its practical uses, Thai ginger is a visually appealing plant that adds a touch of the tropics to any space. Its upright stems and lush foliage create an elegant display, whether grown in a garden bed, raised container, or as part of a decorative indoor arrangement. Growing Thai ginger is also highly rewarding, offering the satisfaction of cultivating a plant that is both beautiful and functional. For more ideas on edible gardening, explore our guide on raised bed vegetable gardening for beginners to create a thriving and productive garden.
Propagating Thai Ginger
Propagating Thai ginger is straightforward and allows you to expand your collection or share this versatile plant with others. The easiest method is division, which involves separating the rhizomes. When repotting or harvesting, carefully dig up the plant and identify healthy sections of the rhizomes with visible buds. Using a clean, sharp knife, cut the rhizome into smaller pieces, ensuring each section has at least one growing point.
Plant the divided rhizomes in fresh soil, following the same steps as for initial planting. Water thoroughly and place the divisions in a warm, humid environment to encourage root establishment. Within a few weeks, new shoots should appear, indicating successful propagation. Propagation through rhizome division not only allows you to grow more Thai ginger but also helps rejuvenate older plants by reducing overcrowding.
Common Issues and Troubleshooting
While Thai ginger is relatively hardy, it may encounter some common issues. Yellowing leaves often indicate overwatering or poor drainage. To resolve this, ensure the soil is well-draining and adjust your watering schedule. Pests such as aphids, spider mites, and mealybugs can occasionally affect the plant. Inspect the foliage regularly and treat infestations promptly with neem oil or insecticidal soap.
If the plant’s growth appears stunted or rhizome development is slow, it may be due to insufficient nutrients or light. Fertilize regularly and provide partial to full sun to encourage vigorous growth. For more tips on maintaining healthy plants, refer to our guide on common garden pests to protect your Thai ginger and other crops from damage.
Harvesting Thai Ginger
Harvesting Thai ginger is a straightforward and rewarding process. The rhizomes are typically ready for harvest 8–10 months after planting, once the foliage begins to yellow and die back. Use a garden fork or spade to carefully dig up the rhizomes without damaging them. For continuous harvests, you can cut off portions of the rhizome while leaving the main plant intact to continue growing.
Freshly harvested galangal can be used immediately in cooking or stored for later use. Wash the rhizomes thoroughly to remove dirt and allow them to dry before storing. For longer storage, freeze or dry the rhizomes to preserve their flavor and aroma. Whether used fresh or preserved, homegrown Thai ginger elevates your culinary creations and offers a sense of accomplishment in growing your own spices.
Long-Term Care and Maintenance
Long-term care is essential for ensuring Thai ginger remains productive year after year. Over time, the plant’s rhizomes will expand, necessitating repotting or dividing every two to three years. Refresh the soil with organic matter during this process to maintain fertility. During the dormant season, typically in cooler months, reduce watering to prevent overwatering and allow the plant to rest.
Pruning dead foliage and regularly inspecting for pests and diseases keep the plant healthy and vigorous. If grown in containers, rotate the pot occasionally to ensure even light exposure and balanced growth. With proper care, Thai ginger will continue to thrive, providing a steady supply of aromatic rhizomes and lush foliage for years to come.
Conclusion
Thai ginger is a versatile and rewarding plant that combines beauty, functionality, and culinary value. Its bold, tropical foliage makes it a stunning addition to any garden or home, while its flavorful and medicinal rhizomes add depth and health benefits to your cooking. By understanding its needs and providing the right care, you can enjoy the satisfaction of growing your own Thai ginger and reaping its many benefits.
Whether you’re an experienced gardener or a beginner, this plant is an excellent choice for edible landscaping or container gardening. For more inspiration on incorporating practical plants into your garden, check out our guides on how to grow basil in a pot. With dedication and proper care, Thai ginger will thrive, offering beauty and flavor season after season.




Leave a Reply