How to Plant Weed Seeds: A Comprehensive Guide
Introduction
Are you looking for a guide on how to plant weed seeds? Cannabis cultivation has gained popularity due to the increasing legalization and recognition of its medicinal benefits. Whether you’re a novice or an experienced gardener, understanding the basics of planting weed seeds is crucial for a successful harvest. This guide will walk you through the entire process, from selecting seeds to harvesting your plants.
Cannabis, commonly known as marijuana, has a rich history that dates back thousands of years. It has been used for various purposes, including medicinal, recreational, and industrial. The cultivation of cannabis has evolved significantly over the years, with advancements in techniques and technology. This guide aims to provide a comprehensive overview of the modern methods used to grow cannabis, ensuring you have the knowledge needed to produce a healthy and bountiful crop.
How to Plant Weed Seeds: Several Steps
Selecting the Right Seeds
The first step in growing cannabis is choosing the right seeds. There are three main types of cannabis seeds: Indica, Sativa, and Hybrid. Indica strains are known for their relaxing effects, Sativa for their energizing effects, and Hybrids offer a combination of both.
Factors to Consider:
- Climate: Choose seeds that are suited to your local climate. Indica strains are typically more resilient and can withstand cooler climates, while Sativa strains prefer warmer, tropical climates. Hybrids can offer a balance and adaptability to different environments.
- Purpose: Determine whether you want to grow cannabis for medicinal or recreational use. Some strains are specifically bred for high THC content, providing a stronger psychoactive effect, while others are bred for high CBD content, offering medicinal benefits without the high.
- Experience Level: Some strains are easier to grow than others. Beginners might want to start with a hardy strain that is resistant to common pests and diseases.
Types of Seeds:
- Regular Seeds: These seeds can produce both male and female plants. They are often used by breeders looking to create new strains. However, growers seeking buds for consumption will need to identify and remove male plants to prevent pollination.
- Feminized Seeds: These seeds are bred to produce only female plants, which are the ones that produce the cannabinoid-rich buds. Feminized seeds are ideal for growers who want to maximize their yield without the hassle of identifying and removing male plants.
- Autoflowering Seeds: These seeds are bred to flower automatically after a certain period, regardless of the light cycle. Autoflowering seeds are perfect for beginners and those looking for a quick harvest, as they typically have a shorter growth cycle.
Preparing for Planting
Before planting, you need to prepare your soil and decide on a germination method.
Soil Preparation
Cannabis plants thrive in well-aerated, nutrient-rich soil. The ideal pH range for soil is between 6.0 and 7.0. You can purchase pre-made cannabis soil or create your own mix using components like peat moss, perlite, and compost.
Soil Composition:
- Peat Moss: Helps retain moisture and provides a good environment for root growth.
- Perlite: Improves aeration and drainage.
- Compost: Adds organic matter and nutrients to the soil.
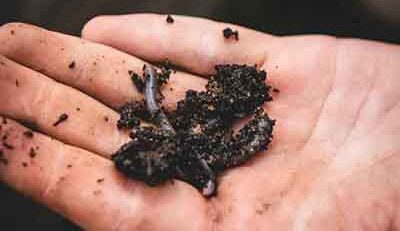
- Worm Castings: A natural fertilizer that provides essential nutrients.
- Lime: Helps balance the pH level of the soil.
Germination Methods
Germination is the process of getting your seeds to sprout. Common methods include:
- Paper Towel Method: Place seeds between damp paper towels and keep them in a warm, dark place. This method allows you to monitor the seeds closely and provides a high germination rate.
- Soaking: Soak seeds in water for 24-48 hours until they crack open. This method can help speed up the germination process by softening the seed shell.
- Direct Planting: Plant seeds directly into the soil or a growing medium. This method mimics natural conditions and reduces the risk of damaging delicate seedlings during transplantation.
Planting Weed Seeds
Once your seeds have germinated, you can plant them in soil or containers.
Direct Soil Planting
- Dig Holes: Make small holes in the soil about 0.5 inches deep.
- Place Seeds: Place the seeds in the holes and cover them lightly with soil.
- Water: Gently water the soil to keep it moist.
Advantages of Direct Soil Planting:
- Promotes strong root development.
- Reduces transplant shock.
- Allows plants to access a larger volume of soil nutrients.
Container Planting
- Fill Containers: Fill containers with a high-quality potting mix.
- Plant Seeds: Make small holes in the mix and place the seeds inside.
- Water: Water the soil to keep it moist but not waterlogged.
Advantages of Container Planting:
- Provides better control over soil conditions.
- Easier to move plants if needed.
- Reduces the risk of pests and diseases from the ground.
Choosing the Right Containers:
- Size: Start with small containers (2-3 inches) for seedlings and transplant them to larger containers (3-5 gallons) as they grow.
- Material: Fabric pots are recommended for their breathability and improved root health. Plastic pots are also commonly used and can be more affordable.
- Drainage: Ensure containers have adequate drainage holes to prevent waterlogging.
Caring for Your Plants
Proper care is essential for healthy cannabis plants. This includes watering, lighting, and providing nutrients.
Watering
- Frequency: Water plants when the top inch of soil feels dry.
- Amount: Ensure the soil is moist but not saturated. Overwatering can lead to root rot, while underwatering can cause nutrient deficiencies.
- pH Level: Maintain a water pH level of 6.0-7.0. Use pH-adjusted water to ensure optimal nutrient uptake.
Watering Techniques:
- Top Watering: Water the soil surface evenly until it drains from the bottom.
- Bottom Watering: Place containers in a tray of water and allow the soil to absorb moisture from the bottom. This method can help prevent overwatering and promotes healthy root growth.
Lighting
Cannabis plants require adequate light to grow. Indoor growers can use LED, fluorescent, or HID lights.
- Light Cycles: Seedlings need 18-24 hours of light per day, while flowering plants need 12 hours of light and 12 hours of darkness.
Types of Grow Lights:
- LED Lights: Energy-efficient and produce less heat, making them ideal for indoor growing. They also offer a full spectrum of light, which is beneficial for all growth stages.
- Fluorescent Lights: Affordable and suitable for small-scale grows. T5 fluorescent lights are commonly used for seedlings and clones.
- HID Lights: High-intensity lights that include Metal Halide (MH) and High-Pressure Sodium (HPS) bulbs. MH bulbs are used for the vegetative stage, while HPS bulbs are used for the flowering stage.
Light Intensity and Distance:
- Ensure lights are positioned at the appropriate distance from the plants to prevent light burn or stretching. Adjust the height of the lights as the plants grow.
- Monitor the temperature and humidity levels to maintain an optimal growing environment.
Nutrients
- Nitrogen (N), Phosphorus (P), and Potassium (K): These are the primary nutrients cannabis plants need.
- Organic vs. Synthetic: Choose between organic fertilizers or synthetic nutrients depending on your preference.
Nutrient Schedule:
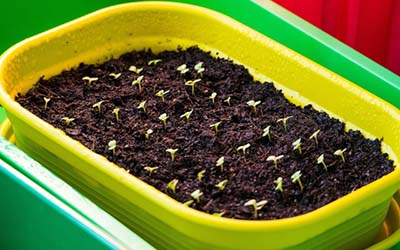
- Seedling Stage: Minimal nutrients are needed. Use a diluted nutrient solution to avoid nutrient burn.
- Vegetative Stage: Increase nitrogen levels to promote leafy growth. A balanced N-P-K ratio of 3-1-2 is recommended.
- Flowering Stage: Reduce nitrogen and increase phosphorus and potassium levels to support bud development. A ratio of 1-3-2 is ideal.
Organic Nutrients:
- Compost Tea: A nutrient-rich solution made from compost. It provides beneficial microorganisms and nutrients.
- Fish Emulsion: A natural fertilizer derived from fish waste. It is high in nitrogen and promotes vigorous growth.
- Bat Guano: A nutrient-dense fertilizer made from bat excrement. It is rich in phosphorus and enhances flowering.
Synthetic Nutrients:
- Liquid Fertilizers: Pre-mixed nutrient solutions that are easy to use. Follow the manufacturer’s instructions for proper dosage.
- Powdered Nutrients: Concentrated nutrients that need to be dissolved in water. They offer a longer shelf life and are cost-effective.
Growth Stages
Cannabis plants go through several growth stages, each requiring different care.
Seedling Stage
- Duration: 2-3 weeks
- Care: Keep soil moist and provide 18-24 hours of light daily.
Seedling Care Tips:
- Use a gentle airflow to strengthen stems and prevent mold.
- Avoid excessive handling of seedlings to prevent damage.
- Monitor for any signs of nutrient deficiencies or pests.
Vegetative Stage
- Duration: 3-16 weeks
- Care: Increase watering and nutrients, provide 18-24 hours of light daily.
Vegetative Stage Tips:
- Train plants using techniques like topping, fimming, and low-stress training (LST) to encourage bushier growth and multiple bud sites.
- Prune lower leaves and branches to improve air circulation and light penetration.
- Monitor plant growth and adjust light height as needed.
Flowering Stage
- Duration: 8-11 weeks
- Care: Reduce light to 12 hours per day, monitor for pests and mold, and adjust nutrients.
Flowering Stage Tips:
- Support heavy branches with stakes or trellises to prevent breakage.
- Reduce humidity levels to prevent mold and bud rot.
- Flush plants with plain water for the last 1-2 weeks to remove excess nutrients and improve flavor.
Common Problems and Solutions
Growing cannabis can present various challenges. If you’re wondering how to plant weed seeds, here are some common problems and their solutions.
Pests:
- Problem: Insects like spider mites, aphids, and whiteflies.
- Solution: Use natural predators like ladybugs or beneficial nematodes. Apply organic insecticides like neem oil or insecticidal soap. Regularly inspect plants and remove any visible pests.
Nutrient Deficiencies:
- Problem: Yellowing leaves, stunted growth, or discolored spots.
- Solution: Adjust nutrient levels and pH of soil. Use a nutrient deficiency chart to identify specific issues and address them promptly.
Mold and Mildew:
- Problem: White powdery spots on leaves or buds.
- Solution: Increase air circulation and reduce humidity. Remove affected leaves and buds to prevent the spread of mold. Use fungicides as a preventive measure.
Environmental Stress:
- Problem: Heat stress, light burn, or cold damage.
- Solution: Maintain optimal temperature and humidity levels. Adjust light distance and intensity. Protect plants from extreme weather conditions.
Overwatering and Underwatering:
- Problem: Drooping leaves, root rot, or nutrient lockout.
- Solution: Ensure proper drainage and follow a consistent watering schedule. Allow the soil to dry out between waterings to prevent root rot.
Harvesting
Knowing when and how to harvest your cannabis plants is crucial for maximizing yield and potency.
When to Harvest:
- Trichomes: Check the trichomes on the buds using a magnifying glass or microscope. Harvest when they are milky white with some amber, indicating peak potency.
- Pistils: Harvest when about 70-90% of the pistils have darkened and curled in. This indicates that the buds have reached maturity.
How to Harvest:
- Cut the Plant: Cut the plant at the base using clean, sharp scissors or pruners. Handle the plant gently to avoid damaging the buds.
- Trim Leaves: Remove large fan leaves and trim smaller leaves. Use trimming scissors to carefully trim away excess foliage, leaving only the buds.
- Drying: Hang the trimmed plants upside down in a dark, well-ventilated area for 7-10 days. Maintain a temperature of 60-70°F (15-21°C) and humidity of 45-55%.
- Curing: Place dried buds in airtight jars, opening them daily for the first week to release moisture. Continue curing for at least 2-4 weeks to enhance flavor and potency.
Drying and Curing Tips:
- Avoid direct sunlight during drying to preserve cannabinoids and terpenes.
- Use a hygrometer to monitor humidity levels inside the curing jars.
- Burp the jars daily to release excess moisture and prevent mold growth.
Conclusion
Growing cannabis from seed to harvest requires careful planning and attention to detail. By selecting the right seeds, preparing your growing environment, and providing proper care, you can enjoy a successful cannabis harvest. Remember that patience and consistency are key to producing high-quality buds.
Cannabis cultivation is both an art and a science, and each grower develops their own techniques and preferences over time. Whether you’re growing for personal use or considering a larger-scale operation, the knowledge and skills you gain through experience will be invaluable. Embrace the journey and enjoy the rewarding experience of cultivating your own cannabis plants.
Happy growing!



Leave a Reply