What to Do with Hostas in the Fall
Introduction
Hostas are beloved perennials known for their lush foliage and ability to thrive in shaded areas, bringing texture and color to any garden. With proper care, these hardy plants can become a beautiful, long-lasting part of your landscape. But as fall approaches, many gardeners wonder what to do with hostas in the fall to prepare them for winter. This guide provides a comprehensive look at caring for hostas during the colder months, so they can return healthier and more vibrant each spring.
Why Plant Hostas?
Hostas are a fantastic addition to any garden, especially for areas that receive partial to full shade. Known for their lush, layered foliage and a variety of leaf colors ranging from deep green to blue-green and even variegated patterns, hostas bring texture and visual interest to spaces that other plants might struggle to brighten. Their low-maintenance nature makes them a favorite for both beginner and experienced gardeners, as they thrive in most soil types and adapt well to different garden conditions. Beyond their aesthetic appeal, hostas help with soil stabilization and prevent erosion with their broad leaves and spreading root systems. They also pair beautifully with other shade-loving plants, like indoor window plants or flowers that look like tulips, creating a balanced and harmonious landscape. Planting hostas is a wonderful choice for enhancing the beauty and resilience of your garden with minimal effort.
Why Fall Care Matters for Hostas
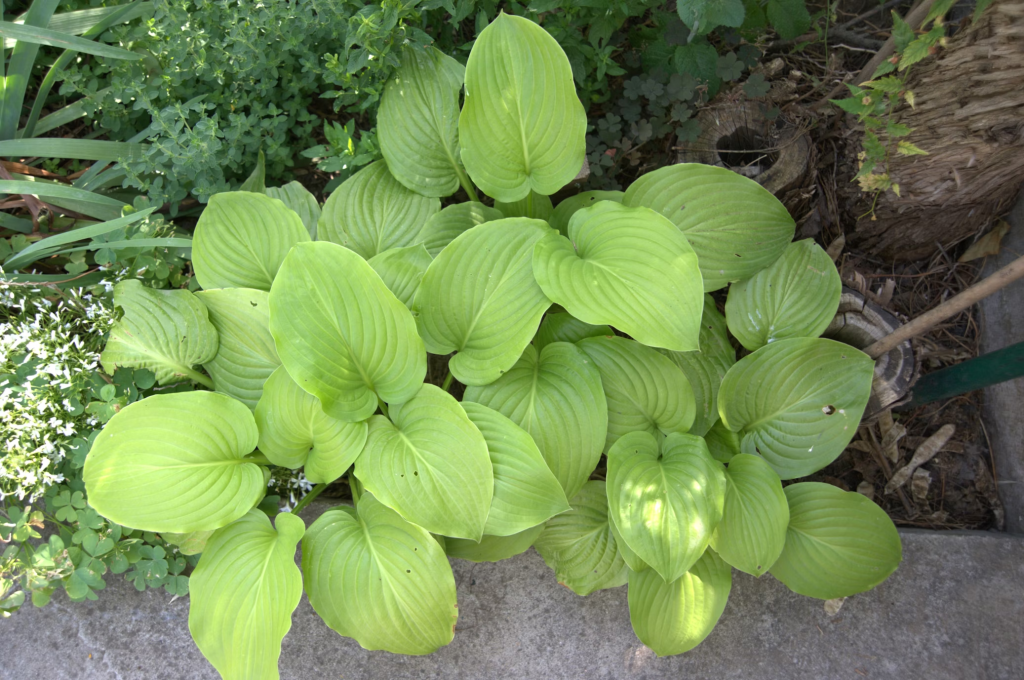
Fall care is crucial for hostas, as it ensures that these perennials survive winter and come back strong in the spring. In fall, hostas enter dormancy to conserve energy and protect themselves from cold conditions. Preparing hostas in the fall helps reduce the risk of winter damage, limits pest problems, and ensures a vigorous spring regrowth. By understanding the needs of hostas in the fall, you can extend their lifespan and enhance their appearance year after year.
When to Start Fall Care for Hostas
The ideal time to begin fall care for hostas varies by region and climate. Generally, it’s best to start once temperatures begin to drop consistently, usually in late September or early October. You’ll know it’s time to prepare your hostas when their leaves start to yellow—a natural indicator that the plant is entering dormancy. In warmer regions, you can wait until later in the season, but it’s essential to begin before the first frost.
Step-by-Step Guide on How to Care for Hostas in Fall
Caring for hostas in the fall ensures they enter winter dormancy healthy and ready for a vibrant spring comeback. Here’s a simple, step-by-step guide to help you prepare your hostas for the colder months:
1. Cutting Back Hostas in the Fall
One of the most essential steps in caring for hostas in the fall is cutting back the foliage. As the leaves yellow and droop, use clean, sharp pruning shears to trim them down to just above ground level. Removing dead foliage reduces the risk of pests and diseases overwintering on the plant and prevents decaying leaves from attracting slugs and other pests. Cutting back also keeps the garden looking tidy through winter.
After trimming, gather all dead or decaying leaves, and discard them to avoid potential disease. Adding cut foliage to your compost bin can help create rich organic matter for next season’s soil. Fall clean-up is essential for maintaining a healthy garden, especially if you’re also managing other perennials like those mentioned in how to prune roses in fall.
2. Dividing Hostas in the Fall
Fall is also a great time to divide hostas, especially if they’ve become overcrowded or too large for their space. Dividing not only promotes healthier growth but also allows you to propagate new plants for other areas of your garden. Follow these steps for dividing hostas:
- Dig around the entire clump of the hosta, loosening the soil.
- Carefully lift the plant out of the ground with a spade.
- Use a sharp knife or garden spade to split the clump into smaller sections, making sure each section has roots and at least one shoot.
- Replant each division in well-draining soil in a shaded or partially shaded area.
Dividing hostas in the fall gives the new sections time to establish roots before winter. This process will ensure a strong start in spring, and it’s a great way to expand your garden without purchasing new plants. If you’re interested in dividing and transplanting plants, see our guide on how to transplant mint for additional tips.
3. Fertilizing Hostas in the Fall: What You Need to Know
Many gardeners ask if they should fertilize hostas in the fall. It’s generally best to avoid fertilizing in late fall, as this can encourage tender new growth that won’t survive winter. Instead, focus on fertilizing in early spring or late summer to promote healthy leaves and roots. Applying compost or mulch in the fall, however, is beneficial, as it enriches the soil without stimulating unnecessary growth. Adding mushroom compost or other organic matter around the plant base is an effective way to improve soil quality for next year.
4. Mulching Hostas for Winter Protection
Mulching is one of the most beneficial steps you can take for hostas in the fall. A 2- to 3-inch layer of mulch around the base of each plant insulates the roots, retains moisture, and prevents the soil from freezing and thawing too quickly. For best results, use organic mulch like shredded leaves, pine needles, or straw. Be sure not to pile the mulch directly on the crown, as this can lead to rot. Mulching is especially useful if you have raised beds for vegetable gardening, where insulation is crucial for maintaining root health.
5. Watering Hostas in the Fall
As temperatures cool, hostas require less water, but it’s essential to keep the soil slightly moist, especially in dry fall weather. Watering deeply just before the first freeze provides the plant with moisture to survive winter. Avoid overwatering, as this can lead to root rot, especially if your soil isn’t well-draining.
Protecting Hostas from Early Frost

Hostas are hardy, but young or recently divided plants benefit from extra frost protection. Covering them with a light layer of straw or a frost blanket during early frosts can protect tender roots and leaves. As hostas enter dormancy, this added layer of insulation helps them transition into winter more comfortably. For other frost-sensitive plants, see our article on What Temperature Will Kill Pansies for additional insights.
Preventing Pests and Diseases
Fall is an ideal time to protect hostas from pests and diseases that may overwinter and affect your garden’s health in spring. Removing dead foliage and trimming back stems is crucial, as decaying plant material can provide a habitat for pests like slugs, snails, aphids, and other harmful insects. Slugs, in particular, are notorious for feeding on hosta leaves, leaving unsightly holes and weakening the plant over time. Cleaning up dead leaves and other plant debris minimizes these hiding spots, making your garden less inviting to pests.
In addition to fall cleanup, consider applying a natural pest deterrent, such as diatomaceous earth or crushed eggshells, around the base of your hostas. These materials create a barrier that can help deter slugs and snails from reaching your plants. Fall is also a good time to inspect the soil around your hostas for any signs of underground pests or grubs that may affect the roots. If you notice signs of an infestation, treating the soil with an organic insecticide can prevent further issues.
Maintaining garden hygiene is essential for minimizing disease as well. Certain fungal diseases, such as crown rot, thrive in damp, decaying matter. Removing any rotting plant materials and ensuring good airflow around the base of your hostas reduces the risk of these diseases taking hold. Additionally, if you notice any diseased or spotted leaves, trim them back immediately to prevent the spread of pathogens to healthy foliage. For further pest management techniques, see our comprehensive guide on common garden pests to keep your garden pest-free year-round.
Preparing Hostas for a Strong Spring
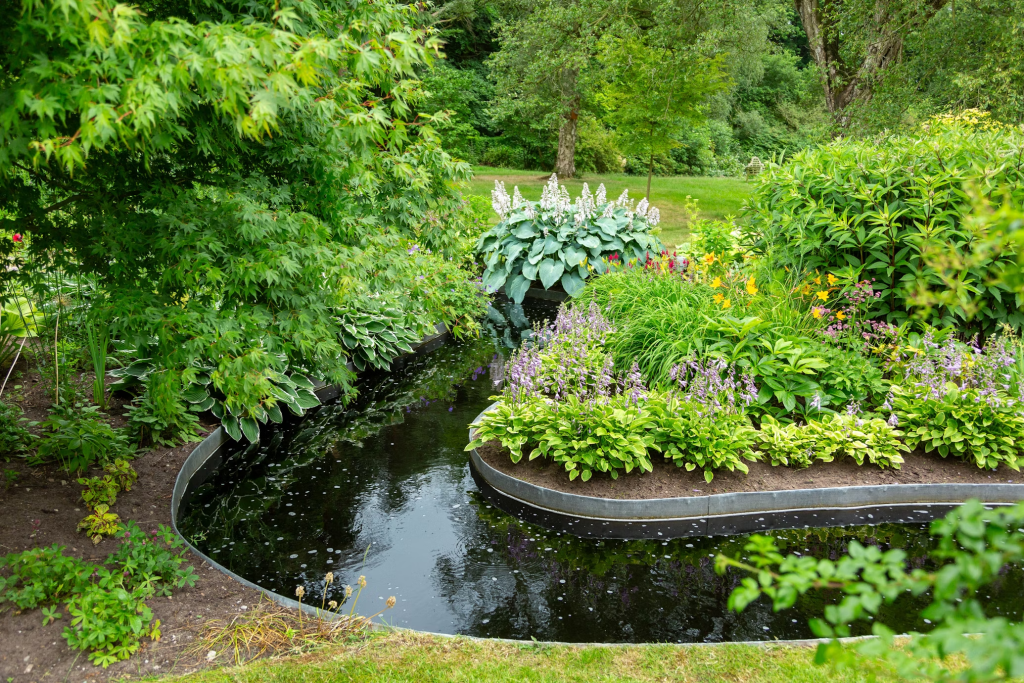
Proper fall care lays the foundation for a healthy spring revival. As winter ends, you’ll notice your hostas begin to sprout again, and the work you did in fall will support that growth. In early spring, consider adding a natural fertilizer for tomatoes near your hostas for a gentle nutrient boost that promotes lush foliage.
Creative Uses for Hosta Leaves in Fall
If you enjoy sustainable gardening, you might find creative uses for the trimmed hosta leaves. Some gardeners repurpose them as mulch for other garden beds or use them to suppress weeds in vegetable patches. Hosta leaves decompose quickly, adding organic matter to the soil and improving its texture. Alternatively, you can add them to your compost pile to create nutrient-rich compost for your garden.
Overwintering Potted Hostas
If you have potted hostas, they may need additional care in colder regions. Bring pots indoors or store them in a protected, frost-free area like a garage or basement. Ensure they remain cool but above freezing, as hostas need a period of dormancy to thrive. Water sparingly through winter, keeping the soil just slightly damp.
Winter Storage Tips for Hostas
In very cold climates, some gardeners choose to dig up and store hostas indoors. To do this, carefully lift the plant after trimming the foliage, and place it in a cool, dry space. Avoid overly warm areas, as hostas require cool temperatures during dormancy. This method is beneficial for smaller, younger plants that may not survive freezing outdoor temperatures.
Conclusion
Preparing hostas in the fall is a crucial part of their care, helping them survive winter and come back strong each spring. From cutting back foliage and dividing plants to adding mulch and protecting from frost, each step ensures that your hostas will thrive for years. Proper fall care protects your plants from winter’s harsh conditions and enhances their growth, ensuring lush, beautiful hostas in the following season. Embrace these fall preparations to enjoy the vibrant beauty of hostas in your garden year after year. For more seasonal care advice, explore our guides on pruning lavender in spring and black coral plant care to enhance your gardening knowledge.





Leave a Reply