

How to Germinate Cannabis Seeds: A Comprehensive Guide
Cannabis cultivation has become increasingly popular as more regions around the world relax their laws on marijuana. Whether you’re growing cannabis for personal use or commercial purposes, the first and most crucial step in the process is germinating your seeds. Germination is the process by which a seed sprouts and begins to grow into a new plant. In this article, we will explore the different methods of germination, the factors that affect the success of germination, and some common mistakes to avoid. By the end, you’ll have a thorough understanding of how to properly germinate cannabis seeds and set the foundation for a healthy and productive cannabis plant.
Understanding the Cannabis Seed
Before diving into the germination process, it’s important to understand what a cannabis seed is and the different types available.
Anatomy of a Cannabis Seed
A cannabis seed is a small, oval-shaped pod that contains the genetic material needed to grow a new cannabis plant. The outer shell, known as the seed coat, protects the embryo inside. When conditions are favorable, the seed absorbs water, causing it to swell and break open. This allows the embryo to emerge and begin its growth process.
Types of Cannabis Seeds
There are several types of cannabis seeds, each with its own characteristics:
- Regular Seeds: These seeds can grow into either male or female plants. Male plants are typically used for breeding, while female plants produce the buds that are harvested for consumption.
- Feminized Seeds: These seeds are bred to produce only female plants, ensuring that every plant will yield usable buds. Feminized seeds are popular among growers who want to maximize their yield.
- Autoflowering Seeds: These seeds are designed to automatically switch from the vegetative stage to the flowering stage based on age rather than changes in light cycles. They are ideal for beginners because they are easier to grow and have a shorter life cycle.
- CBD-Rich Seeds: These seeds are bred to produce plants with high levels of cannabidiol (CBD) and low levels of tetrahydrocannabinol (THC). CBD-rich strains are often used for medicinal purposes.
Factors Affecting Germination Success
Several factors can influence the success rate of cannabis seed germination. Understanding and controlling these factors will greatly increase your chances of successfully germinating your seeds.
Seed Viability
Not all seeds are viable, meaning they may not germinate even under ideal conditions. Fresh, mature seeds have the highest viability. Older seeds or seeds that have been improperly stored may have reduced germination rates.
Temperature
Temperature plays a crucial role in the germination process. Cannabis seeds germinate best at a temperature range of 70-85°F (21-29°C). Temperatures that are too low can slow down the germination process, while temperatures that are too high can damage the seed.
Moisture
Moisture is essential for germination. When a seed absorbs water, it triggers the enzymes that start the growth process. However, it’s important to maintain a balance—too little moisture will prevent germination, while too much moisture can lead to mold or rot.
Light
Cannabis seeds do not need light to germinate. In fact, they germinate best in a dark environment. Once the seedling emerges from the soil, light becomes essential for photosynthesis and growth.
Oxygen
Like all living organisms, cannabis seeds require oxygen to grow. Ensuring that the germination medium is well-aerated and not overly compacted will help the seeds access the oxygen they need.
Germination Methods
There are several methods for germinating cannabis seeds. Each method has its pros and cons, and the best method for you will depend on your experience level, the resources available, and your personal preference.
The Paper Towel Method
The paper towel method is one of the most popular and straightforward methods for germinating cannabis seeds.
Materials Needed:
- Cannabis seeds
- Paper towels
- Two plates or a plastic bag
- Water
Steps:
- Wet the Paper Towels: Dampen two paper towels with water. The towels should be moist but not soaking wet.
- Place the Seeds: Place the seeds between the two damp paper towels. Ensure they are spaced out and not touching each other.
- Create a Dark Environment: Place the paper towels with the seeds between two plates or inside a plastic bag to create a dark, humid environment.
- Monitor and Maintain Moisture: Check the seeds daily to ensure the paper towels remain moist. If they start to dry out, re-dampen them with water.
- Wait for Germination: Within 24-72 hours, you should see the seeds crack open and a small root (taproot) emerging. Once the taproot is about 1-2 cm long, the seed is ready to be planted.
The Direct Soil Method
The direct soil method involves planting the seeds directly into the growing medium. This method is more natural and reduces the risk of damaging the delicate taproot during transplanting.
Materials Needed:
- Cannabis seeds
- Small pots or starter plugs
- High-quality soil or growing medium
- Water
Steps:
- Prepare the Growing Medium: Fill your pots with a high-quality, well-aerated soil or growing medium. Ensure the soil is moist but not waterlogged.
- Plant the Seeds: Make a small hole about 1/4 inch deep in the soil and place the seed inside with the pointed end facing down. Lightly cover the seed with soil.
- Maintain Proper Conditions: Keep the soil moist and maintain a temperature between 70-85°F (21-29°C). Place the pots in a dark or dimly lit area until the seedlings emerge.
- Wait for Germination: Germination can take anywhere from 3-10 days. Once the seedlings emerge from the soil, they need to be placed under a light source.
The Water Glass Method
The water glass method is another simple technique for germinating cannabis seeds. This method is particularly useful for determining seed viability.
Materials Needed:
- Cannabis seeds
- A glass of water
- A dark place
Steps:
- Prepare the Water: Fill a glass with room-temperature water.
- Add the Seeds: Place the cannabis seeds in the glass of water. They may float initially but should sink within a few hours.
- Monitor and Maintain: Keep the glass in a dark place and check the seeds daily. After 24-48 hours, you should see the seeds crack open and the taproot begin to emerge.
- Transfer to Soil: Once the taproot is visible, carefully transfer the seeds to soil or another growing medium.
The Rockwool Method
Rockwool is a popular growing medium among hydroponic growers. It retains moisture well and provides a stable environment for seed germination.
Materials Needed:
- Cannabis seeds
- Rockwool cubes
- pH-adjusted water
- A tray with a humidity dome
Steps:
- Prepare the Rockwool: Soak the Rockwool cubes in pH-adjusted water (pH 5.5-6.0) for a few hours.
- Insert the Seeds: Make a small hole in the center of the Rockwool cube and place the seed inside. Gently cover the hole.
- Place in a Humidity Dome: Place the Rockwool cubes in a tray and cover them with a humidity dome to maintain a moist, warm environment.
- Wait for Germination: Check the cubes daily for moisture levels and signs of germination. Once the seedling emerges, you can remove the humidity dome and place the cubes under a light source.
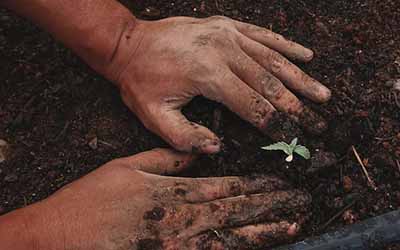
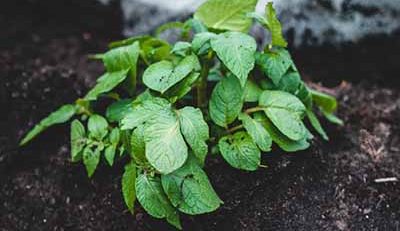
Transplanting the Seedlings
Once your seeds have successfully germinated and the seedlings have developed a set of leaves, it’s time to transplant them into their final growing environment.
Handling Seedlings
Seedlings are delicate and should be handled with care. Always handle them by the leaves, never by the stem or roots, as this can cause damage.
Choosing the Right Growing Medium
The growing medium you choose will depend on your growing setup. Common choices include soil, coco coir, and hydroponic systems. Ensure the medium is well-draining and nutrient-rich.
Transplanting Steps
- Prepare the Growing Medium: Ensure the soil or medium is moist and has been pre-treated with the necessary nutrients.
- Dig a Hole: Make a small hole in the medium, large enough to accommodate the seedling’s root system.
- Transplant the Seedling: Gently place the seedling into the hole, covering the roots with soil. Be careful not to bury the stem too deeply.
- Water: Water the seedling lightly to help it settle into its new environment.
- Provide Light: Once transplanted, ensure the seedlings receive adequate light, whether from natural sunlight or grow lights.
Common Germination Mistakes to Avoid
Even with the best intentions, mistakes can happen during the germination process. Here are some common pitfalls to watch out for:
Overwatering
Too much water can drown the seeds, leading to rot or mold. Keep the growing medium moist, but not soggy.
Underwatering
Conversely, not providing enough moisture can prevent the seed from germinating. Ensure the medium remains consistently damp throughout the germination process.
Improper Temperature
Temperature fluctuations can significantly impact germination success. If the environment is too cold, the seed’s metabolic processes will slow down, delaying germination or preventing it altogether. On the other hand, excessive heat can damage the seed, leading to poor growth or even failure to germinate. Always monitor the temperature and keep it within the ideal range of 70-85°F (21-29°C).
Burying Seeds Too Deep
Planting seeds too deep in the growing medium can hinder their ability to sprout. The seedling may struggle to reach the surface, leading to weak or delayed growth. A good rule of thumb is to plant seeds at a depth of about 1/4 inch (6 mm). If you’re unsure, it’s better to plant the seed too shallow than too deep.
Using Poor Quality Seeds
The quality of the seed itself is a critical factor in successful germination. Seeds that are old, damaged, or of low quality may not germinate at all, or they may produce weak plants. Always source your seeds from reputable breeders or suppliers, and if possible, choose seeds that are fresh and have been stored properly.
Failing to Check pH Levels
The pH level of your water and growing medium can influence germination. Cannabis seeds prefer a slightly acidic environment, with a pH range of 5.5 to 6.5 being ideal. If the pH is too high or too low, it can affect the seed’s ability to absorb water and nutrients, leading to poor germination rates. Using pH-adjusted water and testing your growing medium can help avoid this issue.
Disturbing the Seedling During Germination
Once the seed has started germinating, it’s important to avoid disturbing it. Moving or touching the seed or taproot can cause stress and damage, leading to stunted growth or even killing the seedling. Be patient and allow the seed to germinate fully before handling it.
After Germination: Early Seedling Care
Successfully germinating your cannabis seeds is just the first step. Proper care during the early seedling stage is essential for developing strong, healthy plants.
Light Requirements
Once the seedlings emerge from the soil, they need plenty of light to thrive. For the first few days, it’s best to use a gentle light source, such as fluorescent lights, to avoid overwhelming the delicate seedlings. Gradually introduce more intense light, like LED or HID grow lights, as the seedlings grow stronger. Ensure the lights are positioned at the correct distance to prevent light burn or stretching.
Watering
Young seedlings have small, delicate roots that can be easily overwatered. Watering should be light and consistent, keeping the soil moist but not saturated. As the roots develop, you can gradually increase the amount of water. Using a spray bottle or a gentle watering can is recommended to avoid disturbing the seedlings.
Nutrient Management
In the first few weeks, cannabis seedlings don’t require much in the way of nutrients, as they will draw from the energy stored in the seed itself. However, once they develop their first set of true leaves, you can begin introducing nutrients at a very diluted concentration. Overfeeding can harm the seedlings, so it’s important to start slow and observe the plants for any signs of nutrient burn or deficiency.
Transplanting to a Larger Container
As the seedlings grow, their roots will need more space to expand. Transplanting them into a larger container ensures they have enough room to develop into strong plants. When transplanting, handle the seedlings carefully to avoid damaging the roots. Transplanting is usually done when the seedlings have 3-4 sets of leaves and the roots have filled the current container.
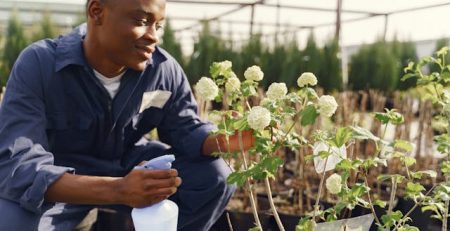
Monitoring for Pests and Diseases
Seedlings are vulnerable to pests and diseases, which can quickly devastate a crop if not addressed promptly. Common issues include damping-off, a fungal disease that causes seedlings to collapse, and infestations by pests like spider mites or aphids. Regularly inspect your plants for any signs of trouble, and take preventative measures, such as using sterilized soil and keeping the grow area clean.
Moving Beyond Germination: The Vegetative Stage
Once your seedlings have established themselves, they will enter the vegetative stage, where rapid growth occurs. During this stage, the plants will develop a strong root system, a robust stem, and lush foliage. Providing the right conditions during this stage is critical for setting up a successful flowering phase.
Increasing Light Intensity
As the plants move from the seedling stage to the vegetative stage, they will require more intense light to support their rapid growth. If you’re growing indoors, ensure your grow lights are powerful enough to deliver the necessary light spectrum. The light schedule should also be adjusted to an 18-6 cycle (18 hours of light and 6 hours of darkness) to encourage vegetative growth.
Nutrient Requirements
During the vegetative stage, cannabis plants require a balanced diet of nutrients, with an emphasis on nitrogen to support leafy growth. Using a quality nutrient solution designed for vegetative growth will ensure your plants receive the necessary macro and micronutrients. Monitor your plants for any signs of nutrient deficiencies or excesses and adjust your feeding regimen as needed.
Training and Pruning
Training and pruning your plants during the vegetative stage can help maximize yield and manage plant height. Techniques like topping, where the main stem is cut to encourage bushier growth, and low-stress training (LST), where branches are gently bent and tied down to spread out the canopy, are commonly used by growers. Proper training ensures that light penetrates all parts of the plant, leading to more even bud development during flowering.
Transplanting to Final Pots
If you haven’t already done so, the early vegetative stage is the time to transplant your plants into their final pots. The final container size will depend on your growing space and desired plant size. Larger pots support bigger plants but require more space and resources. When transplanting, handle the root ball carefully to avoid damaging the roots.
Flowering Stage: Preparing for Harvest
After several weeks in the vegetative stage, cannabis plants will begin to show signs of flowering. This stage is triggered by a change in the light cycle to 12 hours of light and 12 hours of darkness. The flowering stage is when your plants will produce the buds you’ve been working towards.
Identifying Pre-Flowers
Before full flowering begins, plants will show pre-flowers, which indicate the plant’s sex. Male plants produce pollen sacs, while female plants develop pistils. For growers focused on bud production, it’s important to identify and remove male plants to prevent pollination, which can reduce bud quality and yield.
Adjusting Nutrients
During flowering, plants require less nitrogen and more phosphorus and potassium to support bud development. Switching to a bloom-specific nutrient formula will provide the right balance of nutrients. Overfeeding during this stage can lead to nutrient burn, so it’s important to monitor your plants closely and adjust feeding as necessary.
Maintaining Optimal Conditions
The flowering stage is critical, and maintaining optimal growing conditions is essential for maximizing yield and potency. Temperature, humidity, and light intensity should all be carefully controlled. High humidity during flowering can lead to mold and bud rot, so it’s important to keep humidity levels lower than during the vegetative stage.
Monitoring Trichomes for Harvest
As the flowering stage progresses, the buds will develop trichomes, tiny resin glands that contain cannabinoids like THC and CBD. The color of the trichomes is a key indicator of when the buds are ready to harvest. Trichomes will change from clear to milky white and then to amber. Most growers harvest when trichomes are mostly milky with some turning amber for a balanced effect.
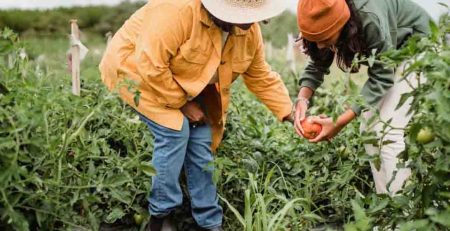
Harvesting and Post-Harvest Considerations
When your cannabis plants are ready for harvest, the process doesn’t end there. Proper harvesting, drying, and curing are essential steps to ensure the quality and potency of your final product.
Harvesting
Use sharp, clean scissors to cut the branches containing the buds. Handle the buds carefully to avoid damaging the trichomes. Some growers prefer to trim the leaves from the buds immediately, while others do it after drying.
Drying
Drying the buds slowly in a dark, well-ventilated space is crucial for preserving potency and flavor. Hang the branches upside down or place the buds on drying racks. Aim for a drying period of 7-14 days, depending on humidity levels. The buds are ready when they feel dry to the touch but not brittle.
Curing
After drying, curing the buds in airtight jars for several weeks will enhance their flavor and potency. Open the jars daily for the first week to release any built-up moisture, then reduce the frequency. Proper curing can take 2-8 weeks, and the longer the cure, the smoother the smoke.
Storing the Final Product
Once cured, store your cannabis in a cool, dark place in airtight containers. Proper storage will preserve the potency and flavor of your cannabis for several months to a year.
Conclusion
Germinating cannabis seeds is the first step in a rewarding journey of cultivating your own plants. By understanding the factors that influence germination, choosing the right method, and avoiding common mistakes, you can set your plants up for success from the very beginning. With proper care during the seedling stage and beyond, you’ll be well on your way to a bountiful harvest. Remember that growing cannabis is both a science and an art, requiring patience, attention to detail, and a willingness to learn. Happy growing!


Leave a Reply